
Upload inventory from a spreadsheet
Use the Inventory Bulk Import app to publish vehicles from a CSV or Excel
(.xlsx) file, such as a stock list or order extract. Each row is read through
your showroom's import template, matched to a configurator, and created or
updated in your inventory.
Before you start
- Your showroom needs the app and a template. The Inventory Bulk Import app must be installed on your showroom, with an import template for your file. The template says which column holds what. Vyro sets it up with you, so contact support if the app or your template is missing.
- Keep the same file layout every time. Column headers must be in row 1, with the names your template expects. A file with renamed or missing columns is rejected.
- Files can be up to 10 MB.
- Uploading again updates vehicles, it doesn't duplicate them. Vehicles from an earlier upload are updated in place.
- Prices can come from a pricelist. If your template prices vehicles from a pricelist, the current pricelist is applied to every upload. See Update inventory prices from a pricelist.
Open the app
- Sign in at https://vyro.co/access.
- In the sidebar, click All services.
- Under Apps, click Inventory Bulk Import.
Check the file with a test run
A test run shows what each row would become, without publishing anything. Run one whenever the file comes from a new source or its layout may have changed.
- Open the Test run tab.
- Choose your Template and select the Inventory file.
- To check the whole file, set Rows to test to 0. Otherwise only the first 10 rows are tested.
- Click Run test.
- Review the results. Each row is marked Processed or Failed. A processed row shows the vehicle it would become, including its price. A failed row says why.
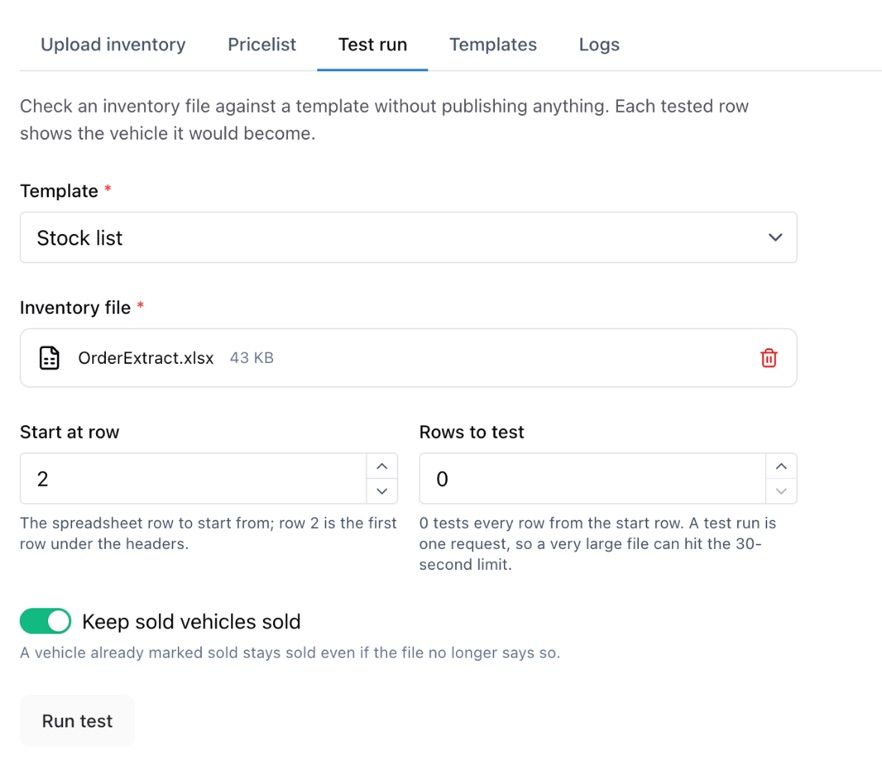
A test run checks the whole file in one go, so a very large file can hit the 30-second limit. If it does, test it in parts with Start at row and Rows to test.
If your template lists one vehicle per variant, rows for the same specification are combined, so you'll see fewer results than rows in the file.
Steps
- Open the Upload inventory tab.
- Choose your Template.
- Select the Inventory file.
- Set the upload options. See Upload options below.
- Click Upload and publish. You'll see Upload queued. Track it in the Logs tab.
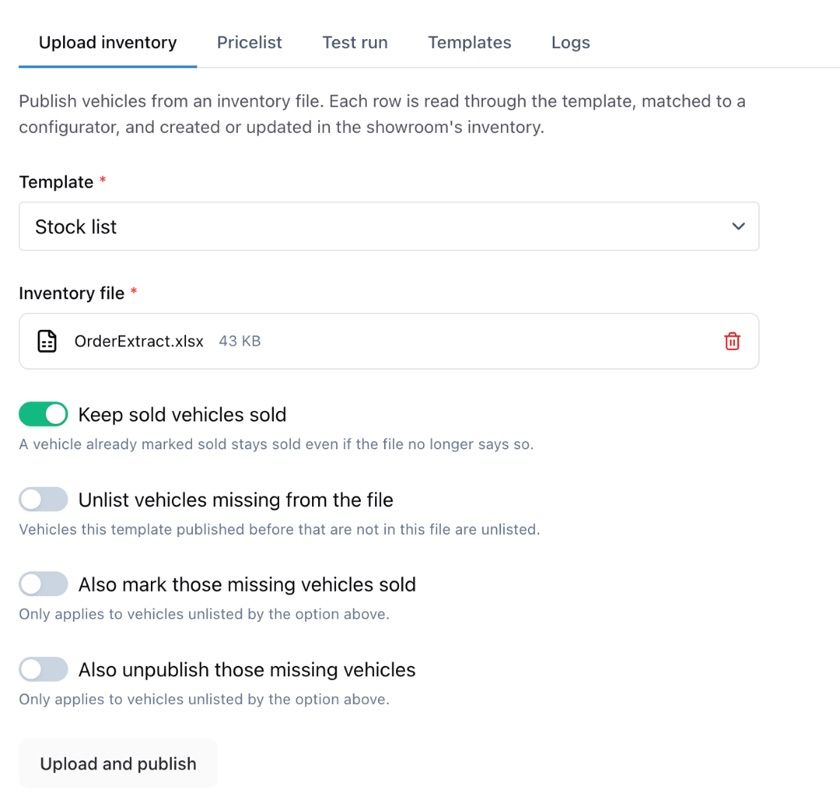
Upload options
- Keep sold vehicles sold (on by default): a vehicle already marked sold stays sold, even if the new file no longer says so. Leave this on unless the file should decide sold status by itself.
- Unlist vehicles missing from the file (off by default): vehicles the importer published before that aren't in this file are hidden from your website. Turn this on when the file is your complete, current stock list. Leave it off for a partial file, such as new arrivals only.
- Also mark those missing vehicles sold: marks the vehicles hidden by the option above as sold too.
- Also unpublish those missing vehicles: unpublishes the vehicles hidden by the option above too.
Only vehicles published through the importer are affected. Vehicles you added by hand in the dashboard are left alone.
Result
- Open the Logs tab. Every upload is listed, newest first. Click Refresh to update it.
- Wait for the upload's status to change to done. This usually takes under a minute.
- Check the vehicles under Inventory in the dashboard, or on your website. They can take a few minutes to appear on the website.
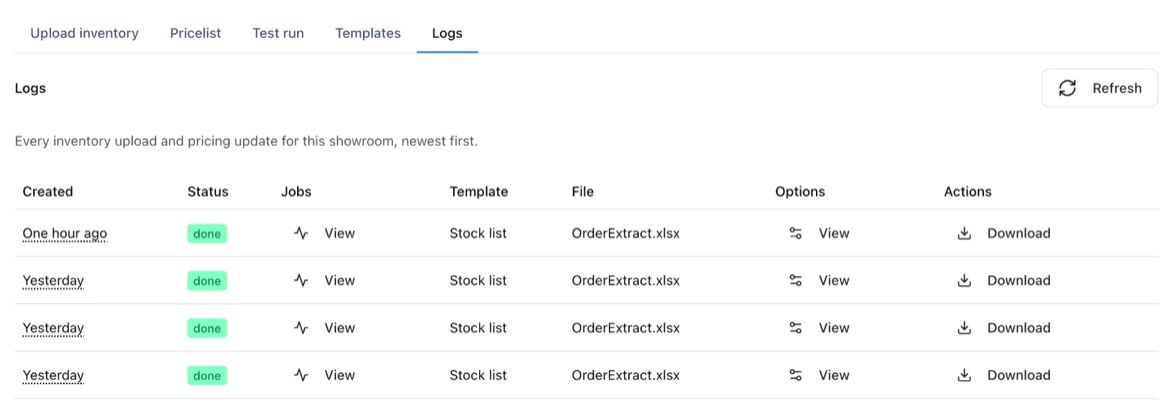
On the Logs tab, View under Options shows the options the upload used, and Download gets the file that was uploaded.
If something goes wrong
- "File is too large": split the file, or remove unused columns, so it's under 10 MB.
- "Missing columns: …": the upload is refused and names the columns it couldn't find. Rename the file's headers to match your template, or ask support to update the template.
- A row fails in the test run: the row's message says why. A message about no configurator usually means that model or variant isn't set up for your showroom yet, so contact support.
- The upload's status is failed: nothing was published. Contact support with the file name and the time you uploaded it.